Nowadays, demand for messaging apps is increasing day by day, and entrepreneurs are waiting for the right development stages. The iOS app is tricky to build as compared to other platform applications. You don’t need to worry about the development process of the chat app for iOS.
By reading this blog, you can easily understand the process of building. We cover everything from integrating the basic features to releasing the chat app on the iOS platform.
It includes both phases, such as the user login view and admin login view, so these phases are built separately and implement engaging specifications.
Stay tuned with us to explore this blog and understand how to build a chat app for iOS and what are the core or simple requirements before starting the development process.
Basic Needs Before Building a Chat App for iOS
Before starting, make sure you have the following:
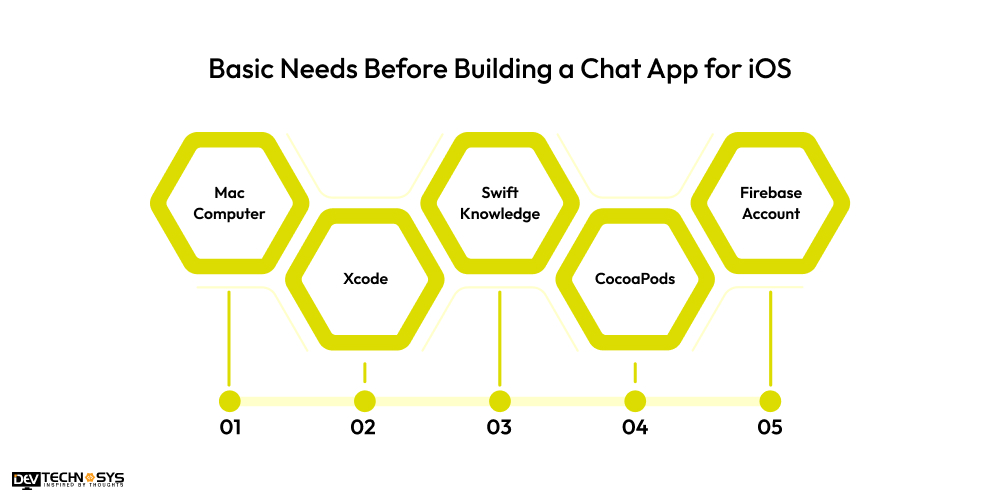
1. Mac Computer: This is necessary for iOS app development.
2. Xcode: The official IDE for iOS development, which you can download from the Mac App Store.
3. Swift Knowledge: Familiarity with the Swift programming language will be useful.
4. CocoaPods: A dependency manager for iOS projects. Install it via terminal using:
Sudo gem install cocoapods
5. Firebase Account: Firebase is one of the best backend solutions for building a real-time chat app. You can create a free Firebase account at Firebase Console.
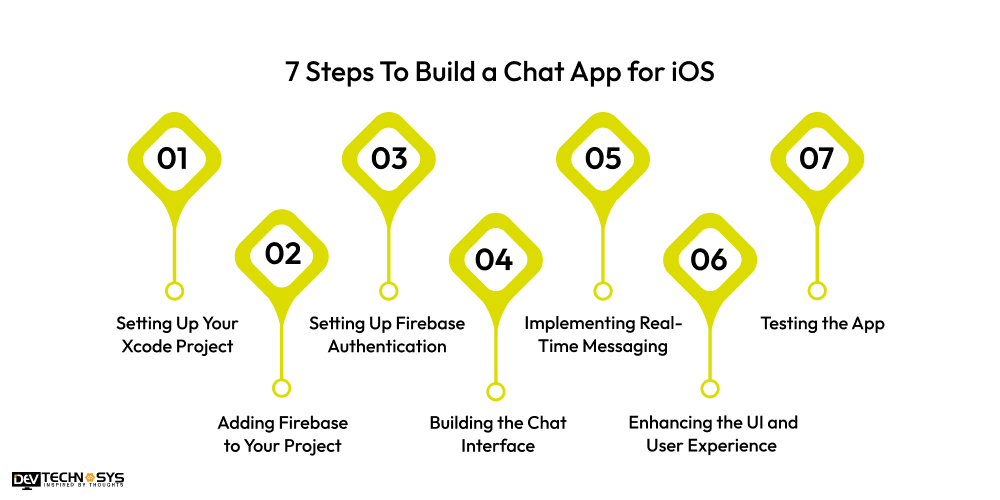
7 Steps To Build a Chat App for iOS
Let’s build an iOS chat app with Firebase; the below steps explain every tiny piece of information that is useful in the development process. If you want to develop an app like WeChat, then you have to consider these robust steps, and you can easily integrate the advanced functionalities. So, here we provide the iOS chat app development tutorial:
Step 1: Setting Up Your Xcode Project
Let’s start by setting up a new Xcode project for your chat app.
Create a New Xcode Project
- Open Xcode and select Create a new Xcode project.
- Choose App as the template.
- Set the product name (e.g., ChatApp) and choose Swift as the language.
- Select Storyboard for the user interface and UIKit App Delegate for the lifecycle.
- Click Next, choose the location to save your project, and then click Create.
Basic Project Setup
Once the project is created, you will be working with Storyboard and ViewControllers. Xcode provides you with an initial ViewController.swift file and a Main.storyboard to design the user interface.
Step 2: Adding Firebase to Your Project
Firebase will serve as the backend for your app. We’ll use Firebase for authentication and Firestore as the real-time database to store messages.
Set Up Firebase
Go to Firebase Console and create a new Firebase project.
In the Firebase Console, select iOS as your platform and register your app by entering the app’s bundle ID (found in Xcode under the General tab).
Download the GoogleService-Info.plist file and add it to your Xcode project. Simply drag and drop this file into your Xcode project’s root directory.
Install Firebase SDK
1. In the terminal, navigate to your project folder.
2. Run the following command to initialize CocoaPods:
pod init
3. Open the newly created Podfile and add the following dependencies:
pod ‘Firebase/Auth’
pod ‘Firebase/Firestore’
pod ‘Firebase/Database’
4. Run the following command to install the Firebase SDK:
pod install
5. After installation, close the Xcode project and open the .xcworkspace file to continue working on your project.
Step 3: Setting Up Firebase Authentication
Firebase Authentication allows you to easily sign users in and manage user sessions. We’ll enable Email/Password authentication for users to sign up and log in.
Enable Authentication in Firebase Console
- Go to Firebase Console.
- Click on Authentication in the left panel and then the Sign-in method tab.
- Enable Email/Password as a sign-in method.
Firebase Authentication Code
Now, let’s add user sign-up and login functionality.
1. Open ViewController.swift and import Firebase:
import FirebaseAuth
2. Add the following code to handle user authentication:
import UIKit
import FirebaseAuth
class ViewController: UIViewController {
@IBOutlet weak var emailTextField: UITextField!
@IBOutlet weak var passwordTextField: UITextField!
override func viewDidLoad() {
super.viewDidLoad()
}
// Sign up a new user
@IBAction func signUpButtonTapped(_ sender: UIButton) {
guard let email = emailTextField.text, let password = passwordTextField.text else { return }
Auth.auth().createUser(withEmail: email, password: password) { (user, error) in
if let error = error {
print(“Error during sign-up: \(error.localizedDescription)”)
return
}
print(“User successfully signed up!”)
// Navigate to the chat screen
}
}
// Login an existing user
@IBAction func loginButtonTapped(_ sender: UIButton) {
guard let email = emailTextField.text, let password = passwordTextField.text else { return }
Auth.auth().signIn(withEmail: email, password: password) { (user, error) in
if let error = error {
print(“Error during login: \(error.localizedDescription)”)
return
}
print(“User successfully logged in!”)
// Navigate to the chat screen
}
}
}
This code allows users to either sign up or log in by entering their email and password.
Step 4: Building the Chat Interface
Next, let’s create a simple chat interface where users can send and receive messages.
Design the Chat UI
- Open Main.storyboard.
- Drag a UITableView onto the view controller to display messages.
- Add a UITextField at the bottom to allow the user to type messages.
- Add a UIButton next to the UITextField to send the message.
Create a Custom TableViewCell
To represent a message, you can create a custom UITableViewCell with a label to display the message content.
1. Create a new Swift file called MessageCell.swift.
2. In the file, define a UITableViewCell subclass:
import UIKit
class MessageCell: UITableViewCell {
@IBOutlet weak var messageLabel: UILabel!
}
3. Back in the storyboard, create a custom UITableViewCell and link it to the MessageCell class. Ensure you give the cell the reuse identifier MessageCell.
Step 5: Implementing Real-Time Messaging
To handle real-time messaging, we’ll use Firebase Firestore, which allows you to store and retrieve messages in real-time.
Set Up Firestore
1. In Firebase Console, go to Firestore Database and click on Create Database.
2. Set Firestore rules to allow read and write access:
service cloud.firestore {
match /databases/{database}/documents {
match /{document=**} {
allow read, write: if true;
}
}
}
Fetching and Sending Messages
Open ChatViewController.swift and add the following code:
import UIKit
import FirebaseAuth
import FirebaseFirestore
class ChatViewController: UIViewController, UITableViewDelegate, UITableViewDataSource {
@IBOutlet weak var chatTableView: UITableView!
@IBOutlet weak var messageInput: UITextField!
var messages: [String] = []
let db = Firestore.firestore()
override func viewDidLoad() {
super.viewDidLoad()
chatTableView.delegate = self
chatTableView.dataSource = self
loadMessages()
}
// Fetch messages from Firestore
func loadMessages() {
db.collection(“messages”).order(by: “timestamp”).addSnapshotListener { snapshot, error in
if let error = error {
print(“Error fetching messages: \(error.localizedDescription)”)
return
}
self.messages.removeAll()
for document in snapshot!.documents {
let message = document[“text”] as? String ?? “”
self.messages.append(message)
}
self.chatTableView.reloadData()
}
}
// Send message to Firestore
@IBAction func sendMessage(_ sender: UIButton) {
guard let messageText = messageInput.text, !messageText.isEmpty else { return }
let messageData: [String: Any] = [
“text”: messageText,
“sender”: Auth.auth().currentUser?.email ?? “Unknown”,
“timestamp”: FieldValue.serverTimestamp()
]
db.collection(“messages”).addDocument(data: messageData) { error in
if let error = error {
print(“Error sending message: \(error.localizedDescription)”)
return
}
self.messageInput.text = “”
}
}
// Table view methods
func tableView(_ tableView: UITableView, numberOfRowsInSection section: Int) -> Int {
return messages.count
}
func tableView(_ tableView: UITableView, cellForRowAt indexPath: IndexPath) -> UITableViewCell {
let cell = tableView.dequeueReusableCell(withIdentifier: “MessageCell”, for: indexPath) as! MessageCell
cell.messageLabel.text = messages[indexPath.row]
return cell
}
}
Real-Time Listener
The addSnapshotListener method listens for changes to the Firestore database and updates the chat view in real-time. When a new message is sent, it’s automatically reflected in the app.
Step 6: Enhancing the UI and User Experience
Hire iPhone app developers to make the app more polished, consider the following improvements:
Custom Message Bubbles
- Implement custom message bubbles to make the interface more user-friendly and appealing.
- Display different colors or styles for messages sent by the user versus those received.
User Avatars
You can fetch and display avatars for users by storing user profile pictures in Firebase Storage or by using the initial letters of their names.
Styling and Themes
- Use different fonts, sizes, and colors to enhance the app’s UI.
- Implement smooth animations for message sending.
Step 7: Testing the App
- Test user authentication: Sign up, log in, and log out with different users.
- Test real-time message sending: Ensure messages appear immediately in the chat view.
- Hire mobile application developers to test on different devices or simulators to ensure compatibility.
Conclusion
Finally, you create a messaging app for iOS, and we hope you have cleared all your doubts about how to build a chat app for iOS and how you can integrate the advanced features. We provide a step-by-step guide for a robust chat app for iOS and also provide the right code to develop easily. You can integrate the best features, such as real-time messaging, push notifications, account management, user profiles, audio and video calls, and multimedia messages.
If you want to know more about to build a chat app with iOS, you can consult with our iOS application development company to provide innovative ideas about app development solutions.
Frequently Asked Questions
1. What Tools And Technologies Do I Need To Build a Chat App for iOS?
To build a chat app in iOS, you need:
- Xcode: Apple’s IDE for developing iOS apps.
- Swift: The programming language used for iOS development.
- Firebase: For authentication, real-time database (Firestore), and backend services.
- CocoaPods: Dependency manager to integrate Firebase SDKs and other libraries.
2. Can I Build a Chat App Without Using Firebase?
Yes, you can build a chat app without Firebase. However, Firebase simplifies many aspects of iOS real-time messaging app development, especially real-time messaging, authentication, and database management. Alternatives to Firebase include:
- Parse Server: Open-source backend that you can host yourself.
- Socket.io: For real-time communication.
- AWS Amplify: Amazon’s backend service for app development.
2. How Much Does It Cost To Develop a Chat App?
The cost to develop a chat app varies, typically ranging from $8,000 to $25,000+, depending on features, complexity, platform (iOS/Android), iOS chat app UI design, and development team location. Advanced features like voice/video calling can increase costs.
2. How Do I Store And Retrieve Messages in The App?
In Firebase, you’ll store messages in Firestore under a collection called “messages” or similar. Each message is a document with fields like text, sender, and timestamp. You can fetch these messages in real-time using addSnapshotListener, which listens for updates and shows new messages as soon as they’re added to Firestore.
3. How Can I Test The App During Development?
During development, you can test your chat app on:
- Simulators in Xcode to test different device sizes.
- Physical devices: You can run your app on an actual iPhone/iPad to test real-time features, such as messaging and user authentication.
- Multiple accounts: Log in with two or more different Firebase accounts on separate devices to test real-time message syncing.
